Resize disk on XCP-ng (using Xen-Orchestra) and resize LVM


How to increase the available disk on a XCP-ng VM and resize the LVM physical and logical volume.
This post is mainly an internal-use one, aimed to help me when I face the same situation in the future. Why do I know I'll face it? Because it is the second time and I didn't document it the first!
Prerrequisites
Shutdown the VM
The disk size cannot be changed while the VM is on, so just turn it off.
Make a snapshot
Everything can go wrong, so it's always handy to make a snapshot of the machine we're going to act on.
But remember: a snapshot it's not a backup, neither a RAID!
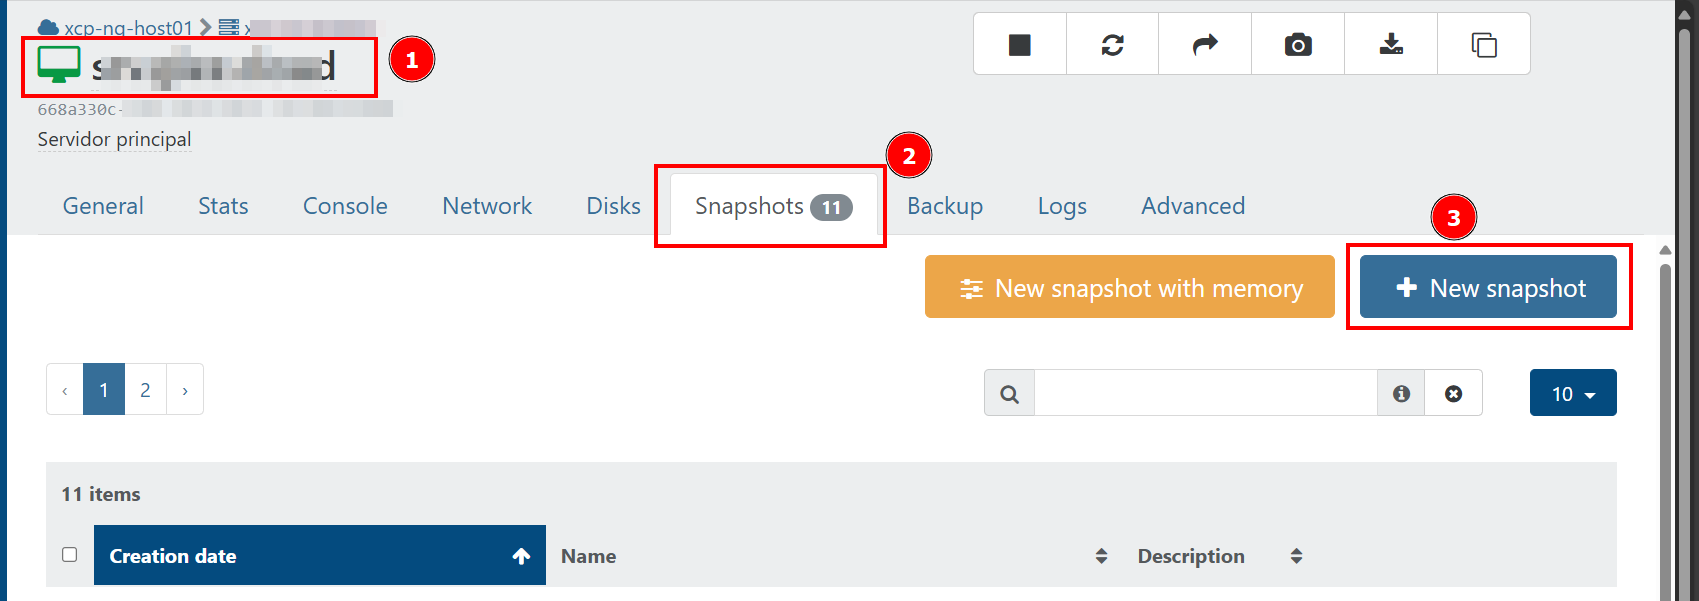
To create a new snapshot on Xen-Orchestra, just navigate to the Snapshots tab on the VM page and select New snapshot:
Resize the disk
As everything in Xen-Orchestra, is mostly straightforward, just enter the new desired disk size and click outside.
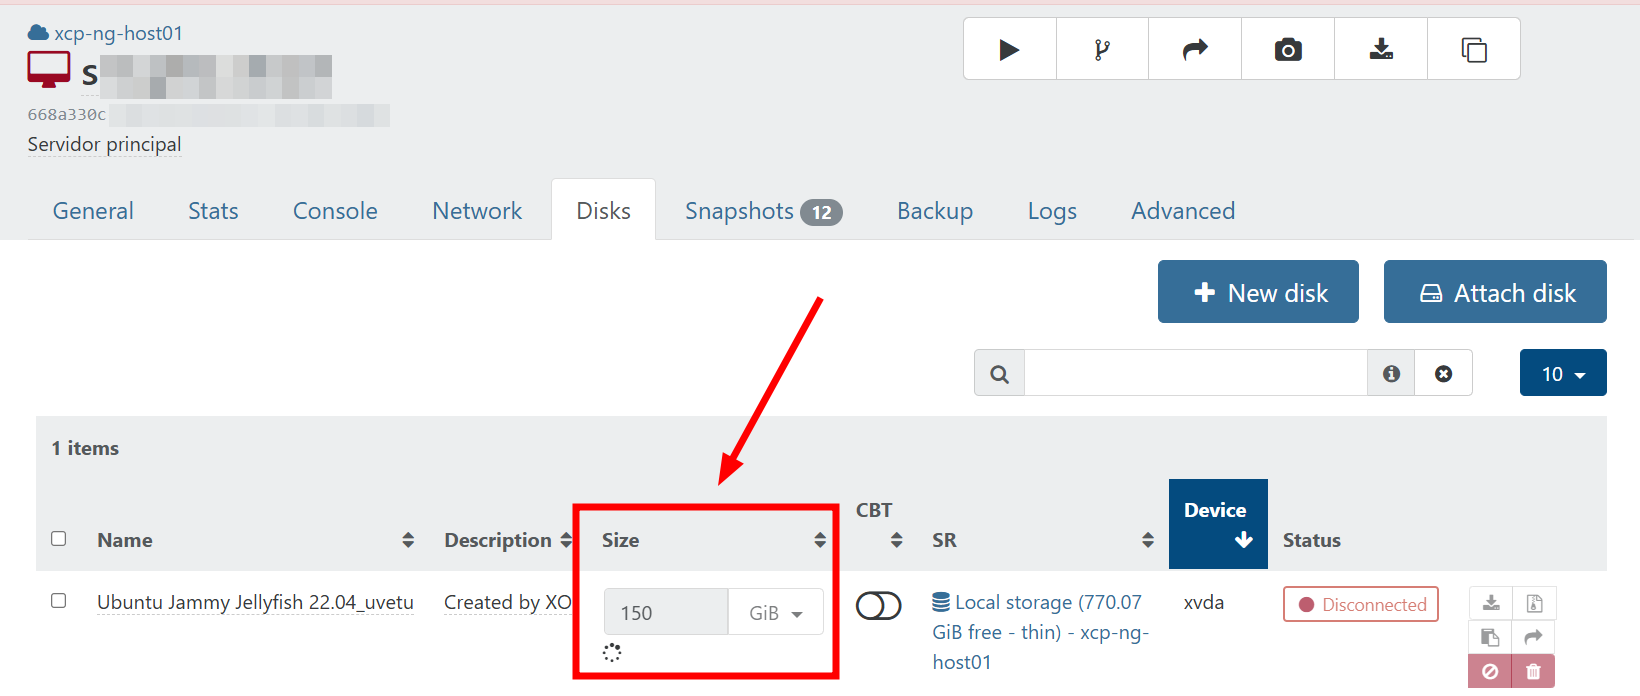
But keep in mind that we've just changed the physical part of the disk, we've to extend also the logical part. ¡Keep reading!
Logical changes
Status pre-changes
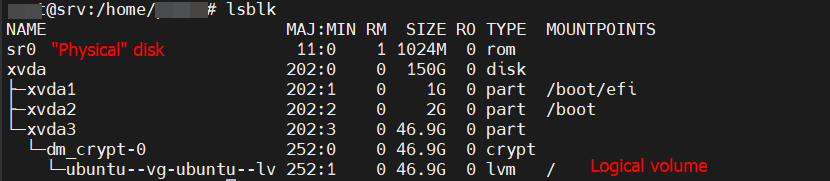
At this moment, if we execute the lsblk (to [list] information about all available [...] block devices) we see that the logical volume still shows ~50 GB
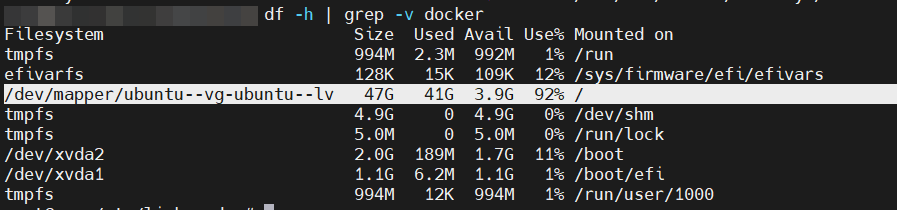
Same if we show the filesystems details:
Create a new partition on the added storage
With fdisk, just enter:
n, to add a new partition.Enter, to select the default partition numberEnter, to select the default first sectorEnter, to select the default last sectorw, to write the changes
Now we can see the partition:
x@x:/# lsblk
NAME                        MAJ:MIN RM  SIZE RO TYPE  MOUNTPOINTS
sr0                          11:0    1 1024M  0 rom
xvda                        202:0    0  150G  0 disk
├─xvda1                     202:1    0    1G  0 part  /boot/efi
├─xvda2                     202:2    0    2G  0 part  /boot
├─xvda3                     202:3    0 46.9G  0 part
│ └─dm_crypt-0              252:0    0 46.9G  0 crypt
│   └─ubuntu--vg-ubuntu--lv 252:1    0 46.9G  0 lvm   /
└─xvda4                     202:4    0  100G  0 part
Extend the LVM logical volume
To extend the logical volume just:
lvextend -l +100%FREE /dev/ubuntu-vg/ubuntu-lv
Con "-l +100%FREE" lo que hacemos es decir que a nivel lógico (-1), se extienda para ocupar todo el espacio disponible.
The output will be something similar to this:
  Size of logical volume ubuntu-vg/ubuntu-lv changed from <46.93 GiB (12014 extents) to <146.93 GiB (37613 extents).
  Logical volume ubuntu-vg/ubuntu-lv successfully resized.
Resize the filesystem
We're almost finishing! Just extend the Filesystem to "see" the new storage:
x@x:/# resize2fs /dev/mapper/ubuntu--vg-ubuntu--lv
resize2fs 1.47.0 (5-Feb-2023)
Filesystem at /dev/mapper/ubuntu--vg-ubuntu--lv is mounted on /; on-line resizing required
old_desc_blocks = 6, new_desc_blocks = 19
The filesystem on /dev/mapper/ubuntu--vg-ubuntu--lv is now 38515712 (4k) blocks long.
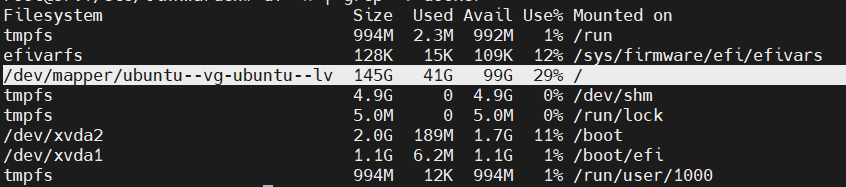
```We can now see the free/available space on the filesystem:
Any doubts?
Do not hesitate to contact me with any questions, suggestions, complaints or clarifications you may have, I'll be happy to talk to you!